
Comment extraire une vidéo YouTube : guide simple pour les extraits
With and over , YouTube has become an endless ocean of valuable video content.
Luckily, sometimes you don't need the whole ocean. You just need a single drop, a perfect moment, a snippet that captures exactly what you want to share. Whether it's a hilarious reaction from your favorite creator's livestream, an insightful tip buried in a hour-long tutorial, or a game-changing moment you want to share across your social media channels, learning how to clip a YouTube video is an essential skill for anyone creating or sharing content.
The good news? Clipping YouTube videos has never been easier! We're here to walk you through everything you need to know about creating, sharing, and making the most of YouTube clips. Let's dive in.
Understanding YouTube's Clipping Feature: What You Should Know
Before we jump into the how-to, let's talk about what YouTube clipping actually means. A YouTube clip is essentially a short segment extracted from a longer video, typically ranging from five to sixty seconds. Think of it as highlighting your favorite passage in a book. You're not rewriting the story, just marking the parts that matter most to you.
YouTube introduced its native clipping feature to make sharing these golden moments incredibly simple. When you create a clip, you're not actually creating a new video file or stealing views from the original creator. Instead, you're creating a special link that plays just that specific portion of the video. The original video still gets credit for watch time, views, and any ad revenue it generates. It's a win-win situation!
But why would you want to clip a YouTube video in the first place? There are countless reasons. Maybe you're a content creator looking to repurpose your long-form content into bite-sized pieces for . Perhaps you found an incredible moment in someone's livestream that your followers absolutely need to see. Or you might be a teacher wanting to share just the relevant five minutes from an educational video without making students watch the entire thing. Whatever your reason, clipping transforms how we interact with and share video content.
It's worth noting that not every video on YouTube can be clipped.
Some creators choose to disable the clipping feature for their content, which is absolutely within their rights. Videos shorter than two minutes, content marked as "made for kids," and certain news channel videos typically can't be clipped either.
How to Clip a YouTube Video Using the Built-In Feature on Desktop
Ready to create your first YouTube clip? Let's start with the easiest method: using 's native clipping tool on your computer.
First things first: you'll need to be signed into your YouTube account. Without logging in, the clip feature won't be available to you.
Once you're logged in, navigate to the video you want to clip. This could be one of your own videos, something from a channel you subscribe to, or really any public video that has clipping enabled. Play the video or skip ahead to roughly where your desired moment lives. Don't worry about being super precise yet, we'll fine-tune everything in a moment.
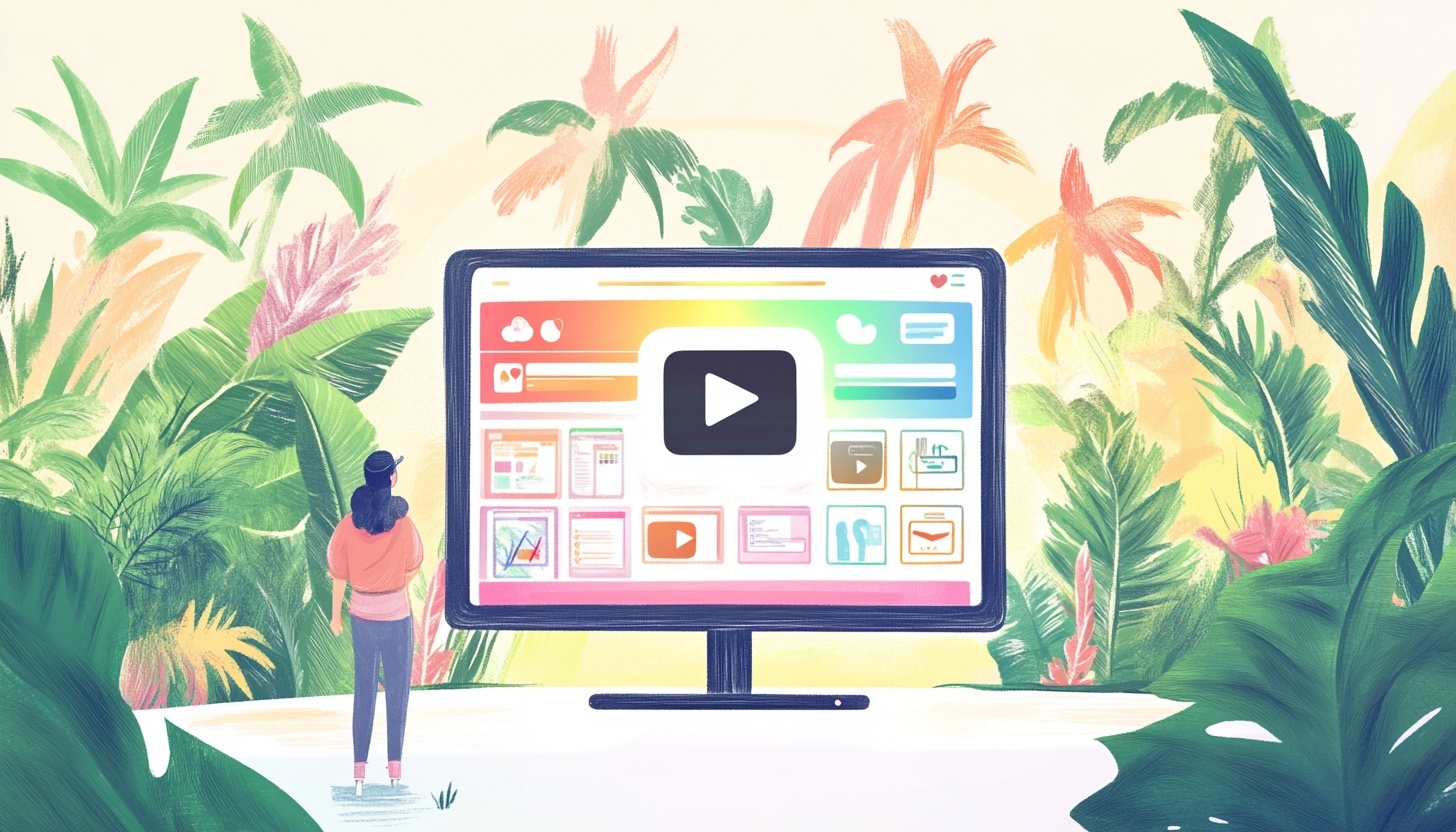
Look below the video player for a button labeled "Clip" alongside other options like Share, Save, and the three-dot menu. Click that Clip button and watch as a new interface pops up on your screen! This is where the magic happens.
You'll see a timeline with two sliders that you can drag to mark the beginning and end of your clip. The minimum length is five seconds, while the maximum stretches to sixty seconds. It gives you plenty of time to capture most moments you'd want to share.
As you adjust these sliders, the video will play your selected segment on a loop, letting you preview exactly what your clip will look like. This real-time preview is incredibly helpful for ensuring you don't accidentally trim off the punchline of a joke or miss the setup to an important point.
Give your clip a descriptive title in the text field provided. This isn't just for your own organization. It also helps others discover your clip if they're searching for similar content. Think of it like naming a bookmark so you can find it again later. You've got up to 140 characters to work with, so make them count!
When you're satisfied with your clip, hit the "Share Clip" button. Congratulations! You've just created a YouTube clip! A shareable link will be generated that you can copy and paste anywhere you'd like. You can share it via email, text message, social media, or even embed it on your website. The beauty of this method is that your clip lives on YouTube's servers, so you don't have to worry about file storage or hosting.
Creating YouTube Clips on Your Mobile Device From Full Videos
What if you're on the go and want to clip a video from your smartphone or tablet? No problem! The YouTube mobile app offers clipping functionality that works similarly to the desktop version, with just a few interface differences to account for touchscreen controls.
Open the YouTube app on your iOS or Android device and find the video you want to clip. Start playing it and look for the Clip button, which typically appears as a scissors icon near the share and like buttons. The exact placement might vary slightly depending on your device and app version, but it's usually pretty easy to spot.
Tap that scissors icon and you'll enter the mobile clipping interface. Here, you'll use touch gestures to drag sliders along the timeline, selecting your start and end points just like on desktop. The touchscreen actually gives you quite a bit of precision. You can fine-tune your selection down to the second, and the selected portion will loop automatically so you can review it before committing.
Add a title to your clip using the on-screen keyboard, then tap "Share Clip" when you're ready. The mobile app makes sharing even more convenient by offering direct integration with other apps on your phone. You can instantly send your clip to Instagram, X, Facebook, or text it to friends through your messaging app. The seamless integration with your device's sharing capabilities makes mobile clipping an incredibly efficient way to spread great content.
One thing to keep in mind: while YouTube's native clipping works great for quick shares and social media posts, remember that these clips are limited to sixty seconds maximum. They also remain hosted on YouTube rather than giving you a downloadable file.
For many purposes, this is perfect! But if you need longer clips or want to download videos for offline editing, you'll need to explore some alternative methods.
Alternative Ways to Clip YouTube Videos When You Need More Control
Sometimes YouTube's built-in clipping feature doesn't quite meet your needs. Maybe the video you want to clip has the feature disabled. Perhaps you need a segment longer than sixty seconds. Or you might want to download the clip to edit it further in your preferred video editing software. Whatever the reason, several alternative approaches can help you clip with more flexibility.
Screen recording
Screen recording is one of the most accessible alternatives because it works with virtually any YouTube video, regardless of clipping permissions. Both Windows and Mac computers come with built-in screen recording capabilities that can capture video directly from your browser. On Windows, you can use the Game Bar feature by pressing the Windows key plus G, which brings up recording controls. Mac users can utilize QuickTime Player's screen recording function for the same purpose.
The process is straightforward: open the YouTube video in your browser, position your playback to just before the moment you want to capture, start your screen recording, play the video segment you want, then stop the recording.
You'll end up with a video file saved directly to your computer that you can edit, trim, or share however you'd like. The downside? Screen recordings can sometimes result in lower quality than the original video, and you might capture interface elements like play buttons or comments unless you enter full-screen mode.
Mobile devices also offer screen recording capabilities. iPhone and iPad users can enable screen recording in their Control Center settings, while Android devices typically have native screen recorders or can use trusted third-party apps from the Google Play Store. Just remember to enable Do Not Disturb mode before recording so notifications don't interrupt your clip!
Third-party tools
Third-party tools and software represent another category of alternatives for clipping YouTube videos. Numerous online platforms allow you to paste a YouTube URL, select your desired start and end times, and download the resulting clip.
For content creators who need more sophisticated features—like generating multiple clips from a single video, creating social media content, or automatically identifying the best moments to clip—there are platforms that offer AI-powered solutions. For example, .
These advanced tools can transcribe your YouTube videos and automatically suggest highlight moments worth clipping, saving you hours of manual review time. Desktop video editing software can also import YouTube videos for clipping and editing.
When exploring third-party tools for creating YouTube Clips, we recommend doing your research before you download YouTube videos. Look for reputable services with good reviews, clear privacy policies, and transparent pricing structures if they offer premium features. Be cautious about tools that seem too good to be true or ask for excessive permissions. Your online security matters!
Transforming Your Clips Into a Content Strategy
Here's where things get really interesting for content creators and marketers. Those YouTube clips you're creating? They're not just shareable links—they're potential goldmines for your entire content strategy! The real power comes from thinking beyond the clip itself and considering how you can repurpose that content across multiple platforms and formats.
If you're serious about content creation, consider how you can extract maximum value from your YouTube videos.
Today's content creation tools can help you transcribe your full videos, generate social media posts, , draft email newsletters, and even identify the most engaging quotes—all from a single upload.
This transforms one long-form mp4 video into dozens of content assets that work together to expand your reach and engage your audience wherever they spend their time online.
The beauty of this strategy is efficiency. Instead of creating unique content for every platform from scratch, you're working smarter by letting your core video content fuel your entire marketing engine. Upload once, then generate clips for TikTok, , , tweets for X, and articles for your blog. Since it's all from the same source material, you save time, and maintain consistency in your messaging while meeting your audience where they are.
Sharing Your YouTube Clips Effectively Across Platforms
Creating a great clip is only half the battle. Sharing them effectively is where the real magic happens. YouTube clips are incredibly versatile when it comes to distribution. The shareable link you receive works universally, meaning you can paste it into virtually any platform or medium that accepts URLs.
For social media sharing, each platform has its own quirks and best practices.
- On Instagram, you might share clip links via Stories with a swipe-up link sticker or send them through direct messages.
- X and Facebook both support link previews that automatically generate attractive cards showing a thumbnail and description from your clip.
- LinkedIn works similarly for professional content sharing. The key is understanding that when you share a YouTube clip link, you're directing people back to the YouTube app rather than uploading a separate video file to each platform.
If you want to embed clips on your website or blog, YouTube makes this easy too. When you create a clip through the desktop interface, you'll see an embed option in the sharing menu. Copy the embed code and paste it into your website's HTML. The embedded clip will play directly on your page, complete with a link back to the full video for viewers who want more. This approach is fantastic for blog posts, tutorials, or any web content that benefits from video examples.
Some platforms work better with direct video uploads rather than links. For these situations, you might need to download your clip using one of the alternative methods we discussed earlier, then upload the video file directly to TikTok, Instagram Reels, or other platforms that prefer native video content. While this requires an extra step, it often results in better engagement since platform algorithms tend to favor content that keeps users on their platform rather than sending them elsewhere.
Best Practices and Important Considerations
Before you go clip-happy with every video you encounter, let's talk about some important best practices. First and foremost: respect copyright and creator rights. Just because you can trim and clip a video doesn't always mean you should, especially if you plan to use that clip for commercial purposes or in ways that might misrepresent the original creator's intent.
YouTube's clipping feature is designed with attribution built in. These clips always link back to the original video and creator. This is good!
It means the original creator gets credit and potential new viewers. However, if you're using screen recording or third-party tools to download clips, make sure you're crediting creators appropriately when you share their content. A simple "Video by @CreatorName" or link to the original source goes a long way toward being a responsible content sharer.
Fair use is a complex legal concept that varies by country and situation. Generally speaking, short clips used for purposes like commentary, criticism, education, or news reporting may fall under fair use protections. But we're not lawyers, and this isn't legal advice!
If you're unsure whether your use of a clip is appropriate, err on the side of caution and seek permission from the creator or consult with a legal professional.
When selecting moments to clip, think about what makes a compelling snippet. The best clips often have a clear beginning, middle, and end—they tell a complete micro-story even when removed from the larger context. Look for emotional peaks, surprising moments, or valuable information that stands on its own. A well-chosen fifteen-second clip can be more powerful than a full sixty seconds that meanders or lacks focus.
Quality matters too! Start with the highest quality source material available. If you're clipping your own videos, upload them in the best quality possible before creating clips. When using screen recording, maximize your browser window and select the highest video quality in YouTube's player settings. These small steps help ensure your clips look professional rather than pixelated or blurry.
Ready to Start Clipping? Your Suivant Steps
We've covered a lot of ground together, from understanding what YouTube clips are to mastering multiple methods for creating them. You now know how to use YouTube's native clipping feature on both desktop and mobile devices, alternative approaches like screen recording for situations where you need more flexibility, and best practices for sharing your clips effectively across different platforms.
La beauté des extraits YouTube réside dans leur accessibilité. Que vous soyez un créateur de contenu expérimenté ou que vous souhaitiez simplement partager un moment amusant avec des amis, les outils sont disponibles et étonnamment faciles à utiliser. Commencez simplement grâce à la fonctionnalité intégrée de YouTube et expérimentez à partir de là. Essayez de découper différents types de contenu pour voir ce qui trouve un écho auprès de votre public. Faites attention aux clips qui sont partagés, commentés ou qui génèrent du trafic vers des vidéos complètes.
N'oubliez pas que chaque bon clip commence par un excellent contenu. Au fur et à mesure que vous développerez vos compétences en matière de découpage, vous reconnaîtrez mieux ces moments dorés qui méritent d'être partagés. Vous apprendrez à chronométrer parfaitement vos clips, à choisir des titres qui attirent l'attention et à sélectionner les bonnes plateformes pour un impact maximal. C'est une compétence qui devient plus facile et plus intuitive avec la pratique.
Pour les créateurs de contenu qui souhaitent faire passer leur stratégie vidéo au niveau supérieur, pensez à explorer des outils qui peuvent vous aider à maximiser la valeur de chaque vidéo que vous produisez. La capacité à identifier rapidement les moments forts, à générer du contenu d'accompagnement pour les réseaux sociaux et à réutiliser vos vidéos dans de multiples formats peut transformer votre flux de contenu, qui prend beaucoup de temps à être rationalisé.
Alors, qu'est-ce que tu attends ? Il existe tout un monde de contenus YouTube avec d'innombrables moments qui méritent d'être extraits et partagés. Trouvez une vidéo qui vous parle, lancez cet outil de clip et commencez à créer ! Que vous souhaitiez créer une présence sur les réseaux sociaux, enseigner à des étudiants, recevoir des amis ou simplement préserver les moments que vous aimez, vous disposez désormais de tout ce dont vous avez besoin pour enregistrer des vidéos YouTube comme un pro.
More blogs like this

Comment utiliser un logiciel d'analyse des appels de vente pour générer plus de revenus
Chaque appel de vente passé par votre équipe contient des données précieuses sur ce qui fonctionne, ce qui ne fonctionne pas et sur les dépenses qui restent sur la table. Mais sans les bons outils pour capturer et analyser ces conversations, ces informations disparaissent dans les airs dès la fin de l'appel.

Les meilleurs services de transcription de podcasts qui méritent d'être essayés aujourd'hui
Lorsque vous transcrivez les épisodes de votre podcast, vous créez essentiellement une mine de contenu riche en mots clés qui peut augmenter votre visibilité en ligne de manière exponentielle. De plus, vous ouvrez votre émission à un public qui préfère lire plutôt qu'écouter, sans parler des personnes sourdes ou malentendantes. Mais nous l'avons compris : transcrire manuellement son propre podcast est une opération brutale. C'est du temps que vous pourriez consacrer à créer un meilleur contenu, à établir des liens avec votre public ou à développer votre émission ! Les meilleurs services de transcription de podcasts vous évitent cette corvée tout en fournissant des transcriptions précises et utilisables qui conviennent à votre flux de travail et à votre budget.

Comment faire une voix off : conseils pour débutants pour un son professionnel
Vous êtes-vous déjà demandé pourquoi certaines voix off vous obligent à arrêter de faire défiler la page alors que d'autres vous obligent à appuyer sur Sauter plus vite que vous ne pouvez dire « S'abonner » ? Le fait est que les spectateurs sont beaucoup plus susceptibles d'abandonner une vidéo dont la qualité audio est médiocre qu'une vidéo dont la qualité visuelle est inférieure. Oui, vous avez bien lu. Votre voix et votre son comptent plus que votre appareil photo sophistiqué !

Comment utiliser des plateformes légitimes pour gagner facilement de l'argent en ligne
Internet a révolutionné la façon dont nous gagnons de l'argent, offrant à quiconque possède un smartphone ou un ordinateur portable des opportunités sans précédent de générer de l'argent supplémentaire ou même de créer une source de revenus à plein temps. Cependant, naviguer dans le champ de mines des escroqueries, des promesses irréalistes et des stratagèmes qui font perdre du temps peut sembler accablant. C'est pourquoi nous avons élaboré ce guide complet pour vous aider à identifier des plateformes fiables et à commencer à gagner de l'argent de la bonne façon. Nous partagerons également des attentes réalistes et des stratégies éprouvées qui fonctionnent réellement. Allons-y pour que tu puisses gagner de l'argent !

Pouvez-vous enregistrer une réunion Zoom : ce que vous devez savoir
Examinons tout ce que vous devez savoir sur l'enregistrement sur le portail Web Zoom. Nous vous expliquerons les fonctionnalités intégrées, explorerons les options qui s'offrent à vous en tant qu'hôte et participant, aborderons les aspects juridiques que vous ne pouvez pas ignorer et partagerons quelques conseils de pro pour rendre vos enregistrements réellement utiles. Allons-y !

Meilleurs outils de référencement : quels sont les meilleurs outils de référencement pour le classement des sites Web
Les agences qui gèrent plusieurs clients passent une grande partie de leur temps à compiler des rapports et à analyser des données sur des plateformes déconnectées. Cette réalité souligne pourquoi la sélection du meilleur logiciel de référencement pour les agences est si essentielle à la survie dans le monde du marketing numérique.

Comment enregistrer Google Meet : enregistrez et partagez vos appels
Dans ce guide, nous vous expliquerons tout ce que vous devez savoir sur l'enregistrement des appels Google Meet, qu'il s'agisse de comprendre les exigences et les autorisations, de maîtriser le processus d'enregistrement sur différents appareils ou d'optimiser la valeur de vos enregistrements !

Meilleur générateur de blogs : 6 outils pour gagner du temps sur les blogs
Dans ce guide, nous examinons sept des meilleurs générateurs de blogs disponibles aujourd'hui. Que vous soyez un entrepreneur indépendant, un stratège en marketing de contenu ou un professionnel du marketing numérique qui souhaite augmenter votre production grâce à des idées de blog incroyables, nous avons ce qu'il vous faut. Explorons comment ces puissants outils peuvent transformer votre flux de travail de blogging et vous aider à récupérer ces précieuses heures.
Les meilleurs outils de marketing de contenu dont vous avez besoin pour 2026
En 2026, la différence entre le succès et l'échec du marketing de contenu ne sera pas seulement une question de stratégie. Il s'agira également de disposer des meilleurs outils de marketing de contenu pour exécuter cette stratégie de contenu de manière efficiente et efficace.